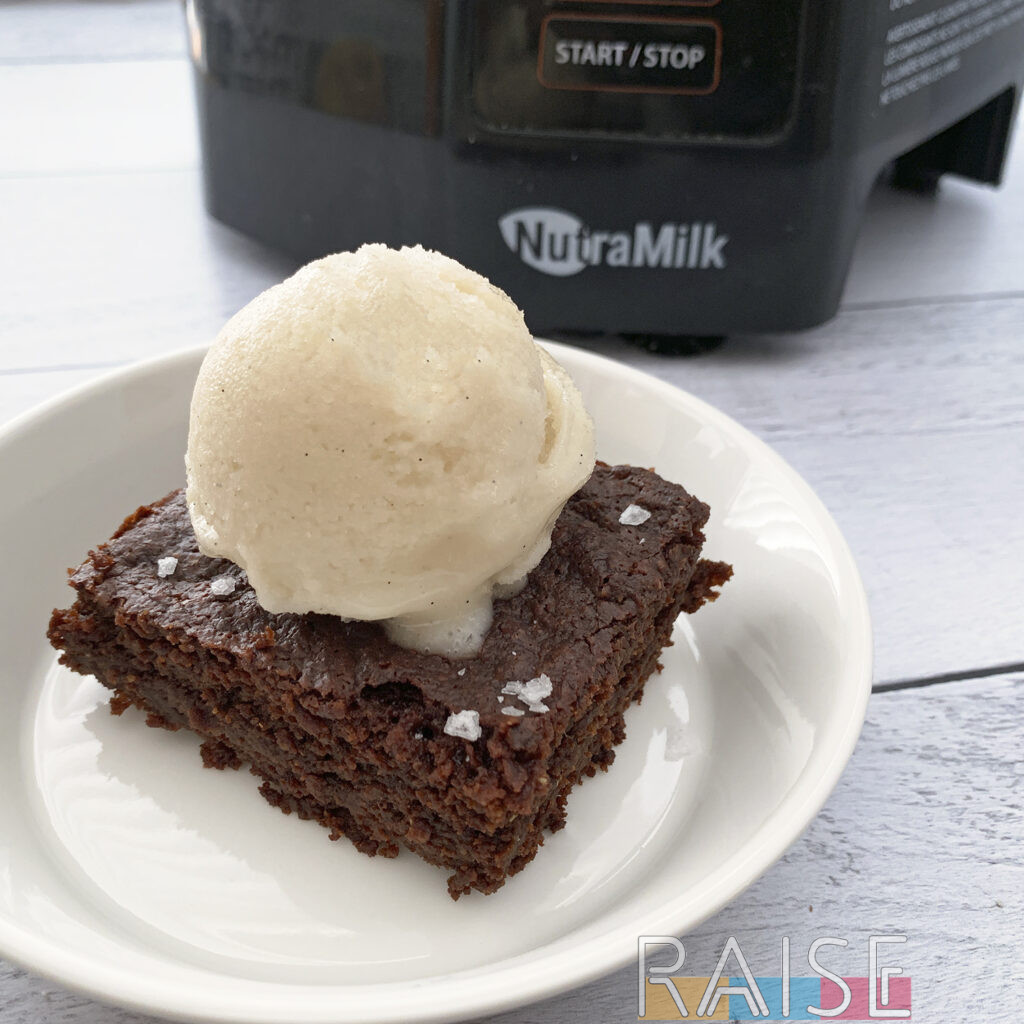
I am so pumped to be sharing a delicious vegan, gluten free brownie recipe with you today. This is not only a gluten free brownie recipe, but it’s also top 9 free and top 14 free. That status makes these fudge brownies super duper inclusive. However! Don’t let the free-from status fool you. This recipe is from my award winning free-from bakery, and will have you doing a little happy dance as you eat them.
In fact, this great recipe was my go-to brownie recipe for years (class parties, holiday parties, etc.) and people without food allergies said these were some of the best brownies they had ever eaten.
Be sure to check the ingredient notes, as well as the Q&A at the bottom of the post, as there’s info about swaps and more.
Note: After the main instructions, I’ve also included directions on how to assemble/decorate Dirt Brownies and Cookie Monster Brownies.
Allergy Status
Free From: Wheat/Gluten, Dairy, Egg, Soy, Tree Nut (including Coconut), Peanut, Fish, Shellfish, Sesame, Top 9 Allergens, Top 14 Allergens, Alliums, Apple, Avocado, Banana, Beans & Lentils, Berries, Buckwheat, Carrot, Celery, Cinnamon, Citrus, Cruciferous, Garlic, Latex Cross Reactive Foods (H/M), Legume, Lupin, Mushroom, Mustard, Nightshade, Oat, Onion, Pea & Pea Protein, Potato (Nightshade Variety), Poultry, Red Meat, Rice, Stone Fruits, Strawberry, Squash & Gourd, Sweet Potato & Yam, Tapioca/Cassava/Yuca/Manioc, Tomato, Yeast
Friendly To: EOE, FPIES, Vegan
Tools You’ll Need to Make Your Vegan Brownies
- Small Bowl (for flax bind)
- Kitchen Scale (this is the one that I use)
- Small Pot
- Large Mixing Bowl
- Handheld Mixer OR Stand Mixer
- Rubber Spatula OR Silicone Spatula (this is the one that I love so much I have 5)

Simple Ingredients for This Vegan Gluten Free Brownie Recipe
Flax Gel/Egg
- 4 TBSP Golden Flax Meal
- 8 TBSP Water (room temperature)
Part 1 Ingredients (Chocolate Butter)
- 100g 85% OR 100% Dark Chocolate Bar or Chocolate Chips
- 100g 55% Chocolate Bar or Chocolate Chips
- 300g Dairy Free Butter
Part 2 Ingredients (Dry Ingredients)
- 220g Organic Maple Sugar
- 150g Organic Dark Brown Sugar
- 100g Sorghum Flour, superfine OR Brown Rice Flour, superfine
- 80g Organic Gluten Free Purity Protocol Oat Flour OR Organic Tiger Nut Flour (tuber, not a tree nut)
- 30g Arrowroot
- 30g Organic Cacao Powder
- 3 tsp Baking Powder
- 1 tsp Sea Salt
Part 3 Ingredients (Wet Ingredients)
- 112mL Milk of Choice (4 ounces)
- 60mL Oil of Choice (2 ounces)
- 60mL Hot Water
- 1 tsp Organic Vanilla Extract
Want more amazing vegan + gluten free desserts? Check out my free-from cookbooks. Each cookbook is packed with awesome options.
 |
 |
Ingredient Notes
Flax: I’m sure you’ll notice I don’t make flax binding agents like how most people make their flax eggs. Please don’t alter this ratio, or you won’t have good recults. For the best outcome, use this brand of golden flaxseed meal.
Dark Chocolate: For top 9 and top 14 free bars and chips, I use this brand. If you need refined sugar free chips, check out this brand.
Butter: If you can have cow’s milk butter, use that. If you’re new to dairy free living, here are brands that sell dairy free/vegan butter. I’ve had great success with the Earth Balance 30 pound food service box, but I know not everyone needs a box that size 😀
Flour: If you don’t need a gluten-free flour blend, replace the sorghum + oat + arrowroot with a total of 210g of all purpose flour.
Cacao: For the best result, use a high quality cacao that delivers on chocolate taste. This is the brand that I use, top 9 free facility.
Maple Sugar: You can swap this for organic coconut sugar or organic date sugar only. Do not swap for other sugars including white sugar, more brown sugar, and so on. This is here to provide the right amount of sweet AND hygroscopic properties. Swapping this to refined sweeteners could lead to a disaster, so swap at your own risk.
It’s rare that I’ll tell you to leave the sugar as is, but this is one of those recipes where you should. If you were to swap the maple sugar for a cane sugar, the final brownies will read as ridiculously sweet.
Milk of Choice: You can use mammal milk, or any plant based milk including soy milk, almond milk, coconut milk from a box (not the full fat canned style), homemade milk, and so on.
Oil of Choice: I don’t suggest vegetable oil or melted coconut oil for this vegan brownie recipe. I use organic extra virgin olive oil and organic tiger nut oil (tuber, not a tree nut) in baking, the results are always *chef’s kiss*.
More Amazing Chocolatey Recipes
If you love chocolate, I think you’ll love these recipes. All gluten free, egg free, vegan, top 9 free, and more.
- Dairy Free Chocolate Pudding (vegan, top 14 free, made with black beans)
- Chocolate Cookie Dough Hummus Recipe
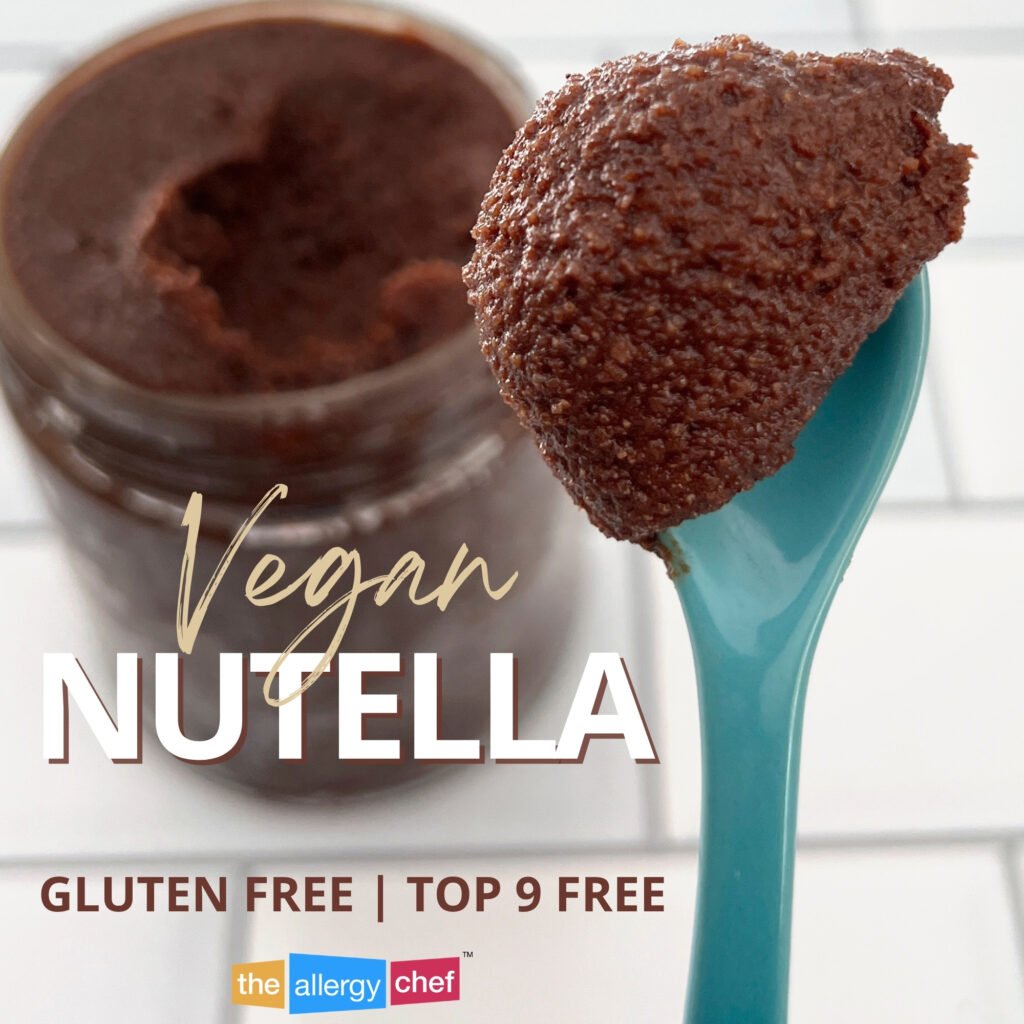
- Vegan Nut Free Nutella Recipe (top 14 free)
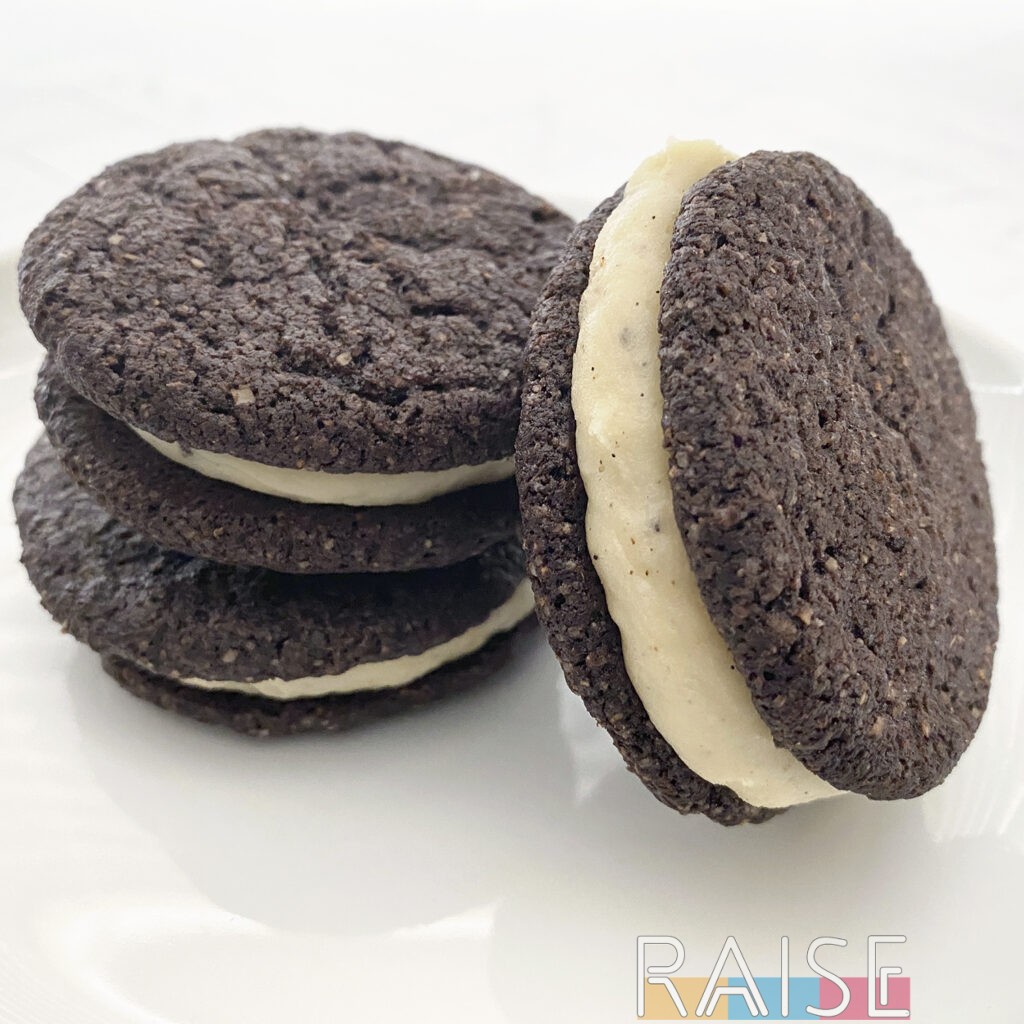
- Oreo Cousins Recipe (Gluten Free, Top 9 Free, Vegan, and I’m told they’re better than store bought Oreos.
 |
 |
 |
 |
Vegan, Gluten Free Brownie Recipe Directions
Whilst there are quite a few steps to make this recipe, overall, this is a very easy vegan + gluten free recipe to make. First, if you’ll be using homemade milk, make your milk and have it ready to go. You can use any mammal or dairy free milk of choice.
Next, combine your flax and water in a small bowl and set aside. Place your empty mixing bowl on your kitchen scale and tare to zero. Add the Part 2 Ingredients (Dry Ingredients) to the bowl one at a time. Don’t forget to tare between weighted ingredients. Once they’re all in, give this a little whisk. This is also a great time to preheat your oven to 350f/175c.
Note: I use a stand mixer with the wire attachment when I make brownies, but you can mix by hand or with an electric handheld mixer.
Now for the Part 1 Ingredients. Place your small pot on your kitchen scale, tare to zero, then add the two chocolate types and butter. Place the pot on the stove and heat on medium heat until the chocolate has melted completely, and the two are well combined. Get your hot water started so it’s ready when you need it (I just turn on a kettle that’s full of water).
Once your chocolate and butter are ready, transfer the mix to your dry goods in the mixing bowl. Combine on low speed until the ingredients are coming together nicely. Now, add your milk, oil, and flax gel. Once these ingredients have combined, add your hot water. Mix on high speed for 30 seconds.
Transfer your brownie batter to a large glass baking dish. I use an 11 x 17. You can also transfer your wet batter to a square baking tin, or other metal pan for baking. Silicone pans and molds can also be used, as well as muffin tins for easy individual servings. For ease, if you use a mini muffin pan or standard muffin pan, use a cookie dough scoop or ice cream scoop to transfer your brownie batter.
Bake at 350f/175c with a baking time of 40 – 50 minutes.
You can test your brownies with a toothpick test, and it should come out clean. Optionally, sprinkle finishing salt on top of the brownies before serving. It adds an amazing kick of flavor!
Texture Note
If you eat your brownies hot, they will be extra fudgy and almost feel under-done. On the flip side, if you allow your brownies to cool completely, you’ll be able to pick them up in your hand, and their texture will be 100% brownie perfection.
If you’re not a fan of the fudgy texture, you can bake the brownies longer, and they won’t have such a noticeable fudgy center. The extra bake time may alter the thin crisp top, so keep a close eye on them.
Storing Your Vegan Gluten-Free Brownies
Storing your brownies is pretty simple. You’ll want an airtight container, or an airtight lid for your baking dish. You can leave the brownies covered at room temperature for 4 days, or you can freeze them for 4+ months.
The texture will change a bit during the freeze/thaw process. After 4 months, you’ll notice another texture shift, and not everyone loves it. They’re still delicious, just not the same as day one brownies fresh from the oven.
If you opt for freezing, pre-cut the brownies so it’s easier to pull what you need in the future. I like to pre slice, freeze the whole baking dish, then transfer frozen brownie slices to a storage baggie.
To thaw, leave a brownie on the counter at room temperature. I don’t suggest reheating from frozen. If you’d like a hot brownie, heat it once thawed, until *just* warm to avoid over cooking.
Free-From Prep Tip
If you’ve ever gone to the grocery store and seen gluten free box mix brownies and thought, man are these expensive, have I got news for you. You can make the same thing at home, and have bags of brownie mix waiting for whenever the desire to bake strikes.
To make your own “box mix brownies”, place an empty mixing bowl on your kitchen scale. Add each of the Part 2 Ingredients (Dry Ingredients) one at a time. Don’t forget to tare between weighted ingredients. Give this a mix, then transfer it to a bag, and this is literally what’s in the box mixes sold in stores.
For ease, label the front with the name and expiration date. The date will be based on the dry ingredients you used, Whichever one will expire first, that’s your expiration date. Print out the Part 1 & Part 3 Ingredients and tape it to the back of the bag.
If you’re a fan of batch cooking or getting ahead in general, you can make 5 bags at a time, so you’re always ready to bake.
How to Make Cookie Monster Brownies
When my gluten free + top 9 free + vegan bakery was operating, this was a customer favourite. It’s pretty easy to make these, and here’s what you’ll need:
- Brownies, baked in a large/standard muffin tin.
- Vanilla frosting, tinted blue (this is the natural allergy friendly dye that I use).
- Vanilla frosting, still white (recipe here).
- Chocolate chip cookies (store bought or homemade)
- Chocolate chips (regular size, not mini, here are some DF + vegan + allergy friendly brands)
- Disposable decorator bag 2x (these are the ones that I use)
- Wilton Tip 32 (or something similar)
To Assemble
- Make your frosting. You’ll need to have some white for the eyes, and tint the rest blue for the body.
- If you’ve baked your brownie muffins in liners, remove the liners and place the brownies upside down (wide side is the bottom).
- Load white frosting into a decorator bag and cut a small hole.
- Load tip 32 into a decorator bag, then add the blue frosting, then cut your hole.
- Cut chocolate chip cookies in half, or whatever shape you’d like. I like to make it look like the cookie is sticking out of the (nonexistent) mouth.
- Take your blue frosting bag and pipe the blue all over the brownie. You’ll use an up and down motion whilst also moving left and right to cover completely. It should not look like perfect drops, but instead, messy “fur”.
- Pipe two small white circles for the eyes.
- Place a chocolate chip, tip side in, on each white circle. The flat side of the chocolate chip should be facing out towards you. You can angle the chips so you have a little crazy eyes happening.
- Stick a piece of chocolate chip cookie on your Cookie Monster’s face.
- Optional: once you have several made, place them on a cake board, then sprinkle chocolate chip cookie crumbs all over to give the illusion of a mess that’s been made by the Cookie Monsters.
Warning: Do NOT tint perfectly textured white frosting with liquid blue, as you’ll split the frosting. You need to remove the white before it’s the right texture, add liquid colouring, then continue making the frosting. In a small bowl, you’ll need to finish the white frosting that’s been removed.

How to Make Dirt & Worm Brownies
When my kids were younger, I used Earth Day as a great reason to break out the gluten free, vegan gummy works and make something a little festive. To make Dirt & Work Brownies, you’re going to need:
- Cooked Brownies
- Vanilla Frosting (here’s a GF + V + Top 14 Free Recipe)
- Gummy Worms of Choice
- Dairy Free Faux M&Ms (these are the top 9 free + vegan candies I use)
- Crushed Oreo-Style Cookies (you can use store bought or a homemade version like this one)
Assembly Steps
- Cut a lot of gummy worms in half.
- Optional: Cut several Choco No-Nos in half.
- Place vanilla frosting on your cooled brownies and spread all over with an angled spatula.
- Whilst the frosting is still fresh, place worms all over, cut side down, so the heads are sticking up. Then, place Choco No-Nos all over, chocolate side down.
- In a baggie, crush several Oreo-style cookies.
- Sprinkle the “dirt” crumbs all over your brownies.
It’s important to apply the candy right after adding the frosting whilst it’s still “wet”. If you wait too long and a thin crust forms, the candy won’t stick nearly as well, nor will the cookie crumbs. Optionally, allow the brownies to sit for at least 30 minutes before setting. It gives the frosting a chance to dry out a bit and form a little crust, making the cuts cleaner.

Boost It!
Without much effort, you can add a bonus layer of nutrition to a batch of brownies with ingredients such as protein powder, freeze dried fruit, and even dried spinach flakes. What’s awesome about these brownies is that they can easily mask the taste of other ingredients. So, the next time you make brownies, think about adding one of these nutritional boosts:
- Organic Ground Mushroom Powder (here’s an example)
- Protein Powder (here’s a top 14 free option, and here’s another brand I adore)
- Dried Spinach Flakes (here’s an example)
- Freeze Dried Blueberries (this is the brand I use)
- Freeze Dried Strawberries (this is the brand that I use)
- Organic Beet Powder (here’s an example)
- Organic Spirulina or Organic Chlorella
- Dulse Flakes or Kombu Flakes
It’s important to use a gentle hand when adding boosts, rather than going all in, especially if you plan to use more than one at a time. Too much of some of these boosts will alter the taste of your brownies and leave you with a bit of a weird aftertaste.
Also, remember, these are just small boosts. Adding nutrient dense ingredients to dessert can’t take the place a proper well rounded diet. Yanno, in case you thought a tablespoon of one of these in your brownies would be a magic bullet.
Change It Up!
The cool thing about brownie recipes is how versatile they are. Not only can you plate them with other desserts (looking at you vanilla ice cream and caramel sauce), but you can also add toppings, create swirls, and more.
Here are some easy toppings you could add to your brownies before baking:
- Crushed Walnuts (also called walnut pieces)
- Crushed Pecans (also called pecan pieces)
- 100% Pure Dark Chocolate Chips OR Artisan Chocolate Chips (something like this will really enhance the chocolate flavor)
Here are a few easy toppings you can add to your vegan brownies after baking
- Candied Nuts (almonds, pecans and cashews would all be awesome) or Candied Seeds
- Caramel Sauce
Crush Vegan + Gluten Free Baking with These Delicious Recipes
If you want to dive deeper into delicious free-from baking, here are some recipes to get you started. All gluten free, top 9 free, vegan, and more.
- Egg Free Peanut Butter Cookies Recipe (one of my kids is a huge fan of this recipe)
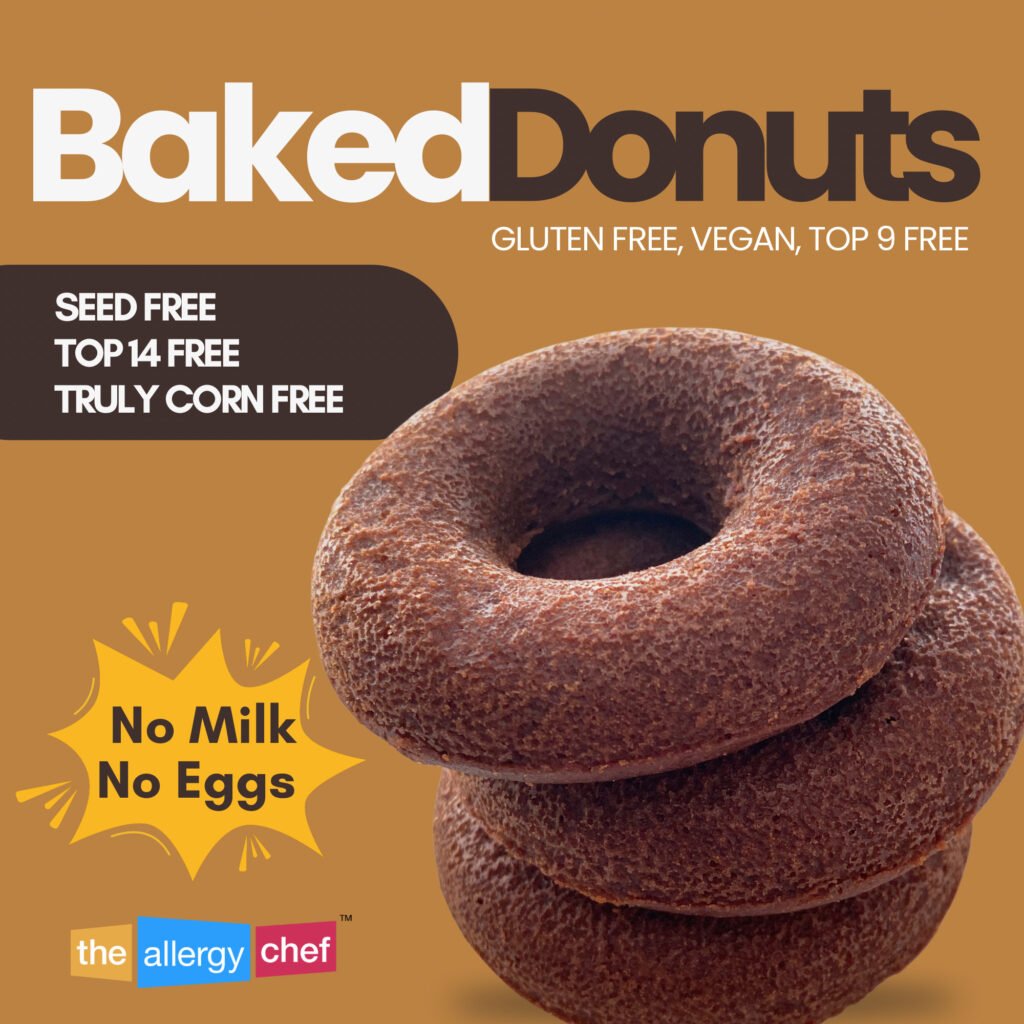
- Easy Baked Chocolate Donuts Recipe (a fantastic sweet treat that’s also freezer friendly)
- Buckwheat Chocolate Chip Cookies without Vanilla (GF, top 9 free, buckwheat is a seed [not a type of wheat])
- Moist Gluten Free + Egg Free Orange Cake Recipe (freezer friendly, top 9 free)
 |
 |
 |
 |
Answering Your Questions About This Vegan Gluten Free Brownie Recipe
Can I use cocoa powder in place of the cacao powder?
When making these egg free chocolate brownies, I can only vouch for the cacao powder. When it comes to making this kind of brownies, the quality of each ingredient really matters. Cacao isn’t the same thing as cocoa, as it’s less processed. It provides a deeper, richer chocolate flavour, and there’s no additional sugar or additives (some cocoa brands are minimal whilst others aren’t).
If you really want or need to make the swap, it would be a 1:1 swap by weight, but I can’t tell you what your results will be, or guarantee that you like them, so manage your expectations.
Will the Enjoy Life chocolate chunks work in place of the chocolate bar?
When you prep the ingredients for these gooey brownies, yes, you can use Enjoy Life chocolate chunks (as well as other brands of dairy free, allergy friendly chocolate chips). Be sure to purchase a percentage that’s similar to what I call for. If Enjoy Life doesn’t have anything close, check out the Pascha brand, as they have a lot of GF + Top 9 Free chocolate chips to choose from.
Should I use an all purpose flour blend with xanthan gum?
There are so many different flours and all-purpose flour blends available these days that it’s hard to keep up. In the gluten free world, Bob’s Red Mill flour is one of the more popular options since it’s available at so many stores nationwide. If that’s a brand you’re familiar with, you’ll notice that the Bob’s Red Mill gluten-free flour mix contains xanthan gum (and some of their products contain other gums).
Commercial brands need xanthan gum because often times, the quality of the flour mix is midrange, and without the gums and conditioners, their mixes wouldn’t be nearly as successful. Not only that, but to be an all purpose flour, these mixes need to be able to produce decent pancakes, waffles, muffins, cakes, and more.
A professional baker and recipe developer like myself has the advantage of small scale and custom flour blends. I can take a look at each application and adjust to ensure the flours are tasting great and performing at a high level. Commercial mills just don’t have that opportunity (unless you’re paying an arm and a leg for the blend).
All of that to say this: if you follow my recipe, no, xanthan gum isn’t needed. However, if you swap my flours for a gluten free all purpose flour mix, especially if the flour mix is a midrange quality, having the xanthan gum will only help you.
If you’d like to use an AP blend, but don’t want the extra stuff, check out Better Batter. They have options that are gum free, and they’re designed for top level free-from baking.
Can I ground flaxseed at home for the gel?
When it comes to making easy vegan brownies, I only suggest using this ground flax meal, or something very similar. Homemade ground flax is going to have a lot of inconsistencies, unless you’ve got it timed down to a science.
I’ve experimented with different brands of ground flaxseed and I can tell you, they’re not created equally, and have difference performance abilities. If you really want to use a homemade ground flaxseed meal, I’d suggest purchasing the one that I’ve linked and really getting a good look at it. Then, make yours, and be precise with timing etc. The goal should be to create something that’s nearly identical, and then you can repeat the process moving forward.
I will add this: I’m a precision, professional baker, hence my advice. I’m sure a hobby baker would brush this off as no big deal. Whilst I know the texture can be thrown by something like this, you honestly may not care, or may not be able to notice the difference. Ultimately, do what you need to do, but if you make any changes to my recipe, I’ll have to kindly ask that you manage your expectations.
Could I use a different egg replacer for this recipe?
No. To get the perfect brownies, stick to the flax bind that I have listed. When you look at the full recipe, you’ll notice that I’ve accounted for the different parts of an egg’s function (lift, moistening, and binding). If you were to trade my flax bind for something else, say, a replacer with more lift, you’ll have a little more air, but super crumbly brownies.
Free-from baking at this level is absolutely a science, so please, leave the recipe as is. In a pinch, you can use a chia seed binding agent, but that will alter the texture of the brownies.
Should I line my baking dish with parchment paper?
Parchment paper is optional with this recipe. I usually bake brownies without parchment paper, and I’ve never had an issue with release. However, if you’re using a pan that tends to give you trouble, by all means, line your dish before adding the batter.
Can I swap the maple sugar with maple syrup?
No, you won’t be able to make this swap. Maple sugar is a granulated sweetener (grain like), whereas maple syrup is a liquid sweetener. In baking, the real thing to remember is granulated for granulated and liquid for liquid. You can make swaps, but it needs to be in the same family.
In the case of maple sugar, the best two swaps will be date sugar and coconut sugar, and that’s because they’re both unrefined sweeteners like maple sugar. Cane sugar (white sugar, light brown sugar, dark brown sugar, etc.) can also be used, but will read as more sweet, because they are.
Can I use coconut flour in place of the flours listed?
No, you won’t be able to use coconut flour as a standalone flour in place of the ones that I call for. Coconut flour is one of several super special flours, as I like to call them. It doesn’t absorb liquid at the same rate as other flours and gluten free flours. If you were to use that instead, you would absolutely ruin your brownies.
If coconut flour is your only option, look online for “coconut flour vegan fudgy brownies recipe”. That should get you in the right ballpark.
Could I make this brownie recipe in my food processor?
In theory, yes, you could make your brownie batter in your food processor. Personally, this isn’t something I’ve ever done. Additionally, even a large food processor won’t be able to hold all of the ingredients. If you’re unable to mix by hand with a whisk, and this is your only option, cut the recipe in half. That should be enough to fit into a large food processor (this is similar to the one that I have).
You may need to cut this vegan brownies recipe down to 25% to fit into a smaller food processor.
Can I use almond meal instead of the flours listed?
Almond meal, also called almond flour, cannot be used in place of the flours listed as a standalone flour. It simply won’t produce the proper results. If almond flour is your only safe option, search online for “almond flour vegan brownie recipe” instead. The vegan will keep you in the egg free realm.
Is it possible to use cup measurements instead of grams?
No. When it comes to free-from baking at this level, precision is key. I’m a professional baker, who even owned and operated an award winning free-from bakery. Here’s the number one tip I can give you: use a kitchen scale.
Not only does this make scaling recipes easier, it also ensures that you get the best results and consistency at home. If you were to use a cup of this or that, the thing is, there’s a lot of discrepancy when measuring. With gluten free flours, if your measurements are off here and there, it can add up to disaster, especially with starches such as arrowroot.
I don’t want you to waste expensive ingredients, and I certainly don’t want you to run into a problem when baking at home. The solution is to give you exact measurements. The good news is that anyone who has come to me about it in the past ends up sending me a note of thanks because one they try it, they LOVE it.
Will this brownie recipe work in an edges only pan?
Yes, you can use this brownie mixture (and my other brownie recipes) in a specialty baking pan. You can use the ones that have loads of edges, but you can also use individual silicone squares, special silicone molds, a non-stick baking pan, and so on.
I’ve tested this recipe in a range of pans, and they all produce fantastic results. There’s no issues with moisture, you get that gooey center, and have a perfect brownie bite each time.
Could I substitute applesauce to sweeten these brownies instead of sugar?
No, that method of sweetening won’t work with this recipe and still produce the proper results. If you want to use applesauce, rather than substitute, look up something like “gluten free vegan applesauce brownie recipe” online.
Applesauce is a liquid sweetener, and it also has a very specific taste that needs to be handled delicately. It would be better for you to follow a recipe that’s already proven to work.
Is there a way to make these dairy-free brownies more chewy?
No, unfortunately, this dairy-free brownie recipe has been developed to be more fudgy. Even if you were to have a longer bake time, you wouldn’t get chewy, rather, you’d get cakey. If chewy is super important to you, I’d suggest looking up “chewy vegan gluten free brownie recipe” online and follow that instead.
I don’t want to see you waste expensive ingredients on something that won’t produce the texture you’re looking for. Wishing you all the best on your recipe hunt 🙂
Would this recipe work with only one teaspoon baking powder?
No, unfortunately, you’re going to need the full three teaspoons. I’m going to guess you’ve run out, and only have one teaspoon baking powder left.
Here’s a recipe for homemade baking powder. If you have those ingredients on hand, you can make a small batch, then use two teaspoons in conjunction with the teaspoon you have left.