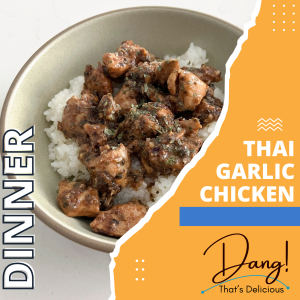
It’s another episode of Dang! That’s Delicious. Today we’ll be making a Thai Crispy Garlic Chicken that’s easy to make, naturally gluten free, and made with simple yet flavourful ingredients. Before we jump in, let’s take a quick look at what Thai cuisine is all about.
A Quick Rundown on Thai Cuisine
Thai cuisine comes from Thailand and has a rich and delicious history. Their flavours are known to be salty, sour, sweet, and spicy. Thai cuisine also leans into fresh herbs, simple proteins, and lots of rich sauces. Below is a list of ingredients that are commonly used in Thai cuisine. Hot Thai Kitchen has a lot more resources if you’d like to make classic Thai recipes using these ingredients and more.
- Black Soy Sauce
- Chilies
- Coconut Sugar & Coconut Milk
- Fermented Pastes (Soy, Shrimp)
- Fish Sauce
- Galangal
- Lemon Grass
- Lime & Lime Leaf
- Oyster Sauce
- Pandan
- Soy Sauce
- Tamarind
- Thai Basil
- Thai Seasoning Sauce (also called Golden Mountain Sauce)
Why I Don’t Use Several Thai Classic Ingredients
When you compare my ingredients in today’s recipe to the list above, you’ll notice I opted to omit several ingredients. It wouldn’t be a recipe from me if it weren’t allergy friendly. My goal is to show you that you can have an amazing Thai meal whilst eliminating major allergens. Yet, the meal is so good you can share it with friends and family. It’s the best of both worlds if you ask me.
Watch the Episode
You can watch the episode here, and visit the Youtube channel for more episodes and step-by-step video tutorials.
Tools You’ll Need to Make Crispy Thai Garlic Chicken
- Cutting Board & Knife
- Scissors (for trimming your chicken)
- Garlic Press
- Large Pan for Cooking
- Rice Cooker (or a pot for cooking your rice) if You’re Serving Over Rice
Ingredients for Thai Crispy Garlic Chicken
- 60mL Oil of Choice for Cooking OR Butter of Choice for Cooking (2 ounces) butter should be room temperature for faster melting
- 520g Organic Chicken Thigh (5)
- 1.5 tsp Smoked Salt
- 4 tsp Thai Basil
- 1 TBSP Organic Date Sugar
- 3/4 tsp Crushed Red Pepper (you can use less or more)
- 1.5 tsp Organic Ground Ginger
- 10 – 15g Fresh Pressed Organic Garlic
- 15g Tamarind Paste (Thai Variety)
- 1.5 TBSP Organic Lime Juice
Cooking Directions for Crispy Thai Garlic Chicken
Start by prepping your chicken and garlic. The chicken should be trimmed, then cut into bite sized pieces (smaller pieces are easier to crisp up and don’t take as long to cook). Your garlic should be peeled, then put thru your garlic press.
Heat a large pan on medium high heat and add your cooking oil. If you’re using a butter, know that room temperature butter will melt faster, however, cold butter will work out just fine as well.
When the oil is heated, or the butter has melted at least half way, add your chicken. Spread it out into a single layer, then add the 1.5 tsp of smoked salt all over. Allow the chicken to cook, untouched, for at least 4 minutes.
Without mixing your chicken, add the basil, date sugar, crushed pepper, ginger, and garlic. Add it all over the chicken to distribute the flavour. After 4 – 5 minutes of cooking, check your chicken. The side touching the pan should have a nice crispy surface. If it’s not crisp yet, continue to cook. If it is crisp, stir your chicken and mix all of the seasonings together well.
Now, add the tamarind concentrate and lime juice and mix again. Continue to cook for an additional 5 – 7 minutes, until all of your chicken has cooked through completely.
That’s it! Not only is this a mega delicious recipe, it’s also an easy meal to make. You can whip this up on busy weeknights without putting in too much effort.
Extra Tips for Success
If this is your first time making chicken, purchase an instant read meat thermometer (I have one in my Amazon Shop). In the video, I describe how you can check the temperature when you think your chicken is done.
Have all of your ingredients out and ready to go. It’s easy to overlook how much easier the cooking experience is when everything has been prepped and is ready.
The reason we don’t season the chicken in advance is to prevent the spices from burning. Since we’re aiming for a crispy exterior, the chicken sits and cooks. Not all spices do well under direct heat, unstirred, for several minutes.
If you’ve never cooked with fresh garlic, you’re in for a real treat. Know that fresh garlic can become bitter if cooked for too long.
Alternative Cooking Directions for a Traditional Fried Chicken Consistency
If you’d like a more fried chicken consistency, place your chicken along with all of the ingredients into a mixing bowl. Stir everything together. Now, add 1/4 cup of all purpose flour and mix well.
In a large/deep pan, add about an inch of oil for frying. Heat the oil until it’s 350f (an instant read thermometer can help you gauge the temperature). Add your chicken to the hot oil, and try to make sure it’s a single layer. If your chicken is in large clumps or stacked, you won’t get a nice fry on all sides. Fry on one side until it’s golden brown, then flip each piece over. Continue to fry until golden brown.
Line a plate with paper towels. Transfer the cooked chicken to your paper towel plate to soak up any excess oil. Use your thermometer to ensure the chicken is cooked. If your chicken is under, place it on a baking tray. Continue to cook in your oven at 400f until your chicken is cooked all the way through. You should only need this step if your chicken pieces are very large.
Ways to Jazz This Recipe Up When Serving
- Serve with a Fried Egg on Top
- Serve with Seasoned Rice Noodles Instead of Steamed Rice
- Garnish with Slices of Fresh Green Onions
- Serve with a Side of Spicy Cucumber Salad
- Top with Diced Fire Roasted Bell Peppers
- Garnish with Sesame Seeds
- Use a Different Rice Variety Each Time (jasmine rice, sushi rice, sticky rice, brown rice, etc.)
Answering Your Thai Crispy Garlic Chicken Recipe Questions
Should I use marinated chicken for this recipe?
You don’t need to use marinated chicken for this recipe, especially if you don’t have the time. The idea is to have a quick option that you can put together in 30 minutes or less. If you’re a fan of meal prep and you’re prepping your raw materials for the week, you can pre-trim and cut the chicken. To take that a step further, you can a it of oil and the seasonings to your chicken pieces and let them sit in the fridge until you’re ready to cook them.
Could this recipe be made with chicken leg quarters?
It could, but the cook time will be much longer. Should you opt for a larger cut of chicken, start in the pan and get one side of the chicken nice and crisp. Transfer your chicken to an oven safe dish and bake at 400f until the internal temperature has reached 165f. The cook time will vary based on the size of the meat.
Can I use chicken breast meat for this recipe?
Yes, you can use chicken breasts instead of chicken thigh in this recipe. Make sure you trim it to remove any gristle and cut it down into bite sized pieces. You’ll have a similar cook time as the instructions above.
Will brown sugar work in place of the date sugar?
Yes, brown sugar will work since it’s also a granulated sweetener. You can also use light brown sugar, raw sugar, coconut sugar, and maple sugar.
Can I use store-bought chopped garlic instead of fresh pressed garlic?
Yes, you can. Just know that the garlic flavour will be a bit more mild when using store bought jarred garlic.